
Oxygen Not Included How to Make a Cooling System That Works
Oxygen Not Included how to make a cooling system: build an Aquatuner loop, protect your crops, and control heat with a Steam Turbine and safe automation.
Jump to
How to Make a Cooling System
Wondering in Oxygen Not Included how to make a cooling system before your crops overheat? Build a polluted-water loop through a steel Thermo Aquatuner inside an insulated steam chamber, with a Steam Turbine above it. Add temperature automation, bypass piping, and turbine cooling so the system can keep working.
The Aquatuner moves heat from the liquid into its surroundings. The Steam Turbine handles that heat through the steam chamber, while the circulating coolant absorbs heat from your base. An Aquatuner needs somewhere to send its heat—placing one beside your farm simply moves the problem into the room.
| Component | Key requirement or behavior |
|---|---|
| Steel Thermo Aquatuner | Requires 1,200 kg of steel; reduces passing coolant temperature by 14°C |
| Steam Turbine | Requires 200 kg of plastic, plus its other construction materials |
| Polluted-water coolant | Freezes at approximately −20°C and boils at approximately 120°C |
| Liquid Pipe Thermo Sensor | Goes immediately before the Aquatuner input and controls its operation |
| Bypass | Keeps coolant circulating when the Aquatuner is disabled |
| Turbine cooling | Removes heat from the turbine building so it remains operational |
For ordinary living quarters, aim around 20°C and check each crop’s requirements separately. Bristle Blossoms grow between 5°C and 30°C, so a farm approaching the upper limit needs attention before food production stops.
Official page: Oxygen Not Included (klei.com)
Build the Aquatuner and Steam Turbine Setup
 Image: Steam / Klei Entertainment
1. Prepare an insulated steam chamber
Build the Aquatuner inside an insulated chamber, with the Steam Turbine above it and its intake ports exposed to the chamber below. Add water that can absorb the Aquatuner’s heat and eventually become steam.
Use steel for the Aquatuner. Gold amalgam raises its overheat temperature to 175°C, but steel provides more reliable protection for this application.
Remove stray gases before sealing the chamber. Pockets of oxygen or other gases can interfere with the intended steam environment. For the steam charge, use the recommended range of 10–100 kg per tile.
Keep the turbine’s water-return plumbing separate from the coolant circuit:
- The coolant circuit carries polluted water through the Aquatuner and the areas you want to cool.
- The turbine return line sends the turbine’s liquid output back into the steam chamber.
Use insulated liquid pipes inside the steam chamber so the chilled coolant does not immediately absorb the heat you just removed.
2. Route a closed cooling loop
Run the coolant pipe from the Aquatuner through the turbine room, through your base, and back to the Aquatuner input. Add the bypass described below before starting the system.
Choose pipe materials according to where heat should move:
- Insulated pipes: Carry coolant through the steam chamber and other areas you do not want to cool.
- Regular granite pipes: Exchange heat gradually through farms and living quarters.
- Radiant pipes: Increase heat transfer around concentrated heat sources and temperature-sensitive equipment.
You do not need radiant pipes across the entire base. Use short radiant sections near hot oxygen lines, cooking equipment, or warm entrances, then use granite pipes for broader coverage.
Fill the loop through a Liquid Bridge connection. This lets liquid enter when space is available and helps prevent overfilling. Once filled and correctly routed, the closed loop circulates without a pump continuously pushing its contents.
3. Add temperature control
Place a Liquid Pipe Thermo Sensor immediately before the Aquatuner’s input. Connect it to the Aquatuner with automation wire and configure it to send a green signal when the coolant is above your chosen threshold.
The Aquatuner always reduces the temperature of passing liquid by 14°C. It does not cool each packet precisely to the sensor setting.
For a base targeting around 20°C, start with the sensor set to Above 27°C. This follows the midpoint approach: cooling a packet at that threshold brings it down to around 13°C, after which it warms while collecting heat.
Treat this as a starting setting rather than an exact room thermostat. The surrounding tiles, coolant volume, and heat load affect the room’s actual temperature.
Keep the activation threshold at least 14°C above the coolant’s freezing point, with additional room for safety. Avoid lead for automation components inside the hot chamber because it can melt.
4. Install the Aquatuner bypass
When automation disables the Aquatuner, coolant must still travel around the loop.
Continue the incoming pipe past the Aquatuner’s input to a bypass bridge. Connect the bridge’s output back onto the outgoing coolant line, arranging the junction so liquid leaving the Aquatuner can pass without being blocked by bypass traffic.
The two operating paths are:
- Aquatuner enabled: Liquid enters the machine and leaves 14°C colder.
- Aquatuner disabled: Liquid continues through the bypass and returns to the cooling loop.
Use the bridge to establish flow direction. An ambiguous pipe junction can stall circulation even when the rest of the build is connected correctly.
5. Cool the turbine building
After the cooled and bypassed paths merge, route a heat-exchanging pipe section behind the Steam Turbine.
Keep the turbine in an environment that transfers heat between the building and the cooling pipes. An ordinary base-cooling loop below 100°C can handle this role, provided it has enough cooling capacity.
For extremely cold applications, add separate temperature control to the turbine branch. Overcooling can freeze its surrounding atmosphere and interrupt heat transfer.
6. Connect a stable power supply
Feed the Aquatuner with conductive wire and check the circuit’s total load. The turbine can connect to the power network, but the cooling system still needs dependable power.
Watch the first operating cycles. Confirm that coolant keeps moving when automation switches the Aquatuner off, that the chamber heats as intended, and that the turbine receives cooling.
Choose Coolant for the Temperature You Need
The Aquatuner removes a fixed number of degrees from each packet. A liquid with greater specific heat capacity carries more heat per degree, so coolant choice directly affects how much cooling you get from the machine.
 Image: Steam / Klei Entertainment
Use polluted water for a typical base-cooling loop. It has high specific heat capacity and a wider liquid temperature range than clean water. Its approximate −20°C freezing point leaves useful room below ordinary farm temperatures.
Keep full 10 kg liquid packets moving through the Aquatuner. Smaller packets still cost the same power to process, reducing the heat moved for that electricity.
Super Coolant is the late-game upgrade for demanding cooling systems. Choose it when its properties suit the temperatures you need, rather than rebuilding an ordinary farm loop simply to use a more advanced material.
Thermo Regulators handle gases, but Aquatuners offer several advantages for this build:
- Liquid pipes carry 10 kg/s, compared with 1 kg/s in gas pipes.
- Aquatuners are twice as power-efficient with the same coolant material.
- Common liquid coolants have greater specific heat capacity than common gases.
- Aquatuners can operate fully submerged, making the steam-chamber arrangement practical.
Reduce Heat Entering Your Base
Insulation reduces the work your cooling system must perform. Surround living quarters and farms with insulated tiles where they border hot biomes, and move coal generators, natural gas generators, and industrial equipment outside that boundary.
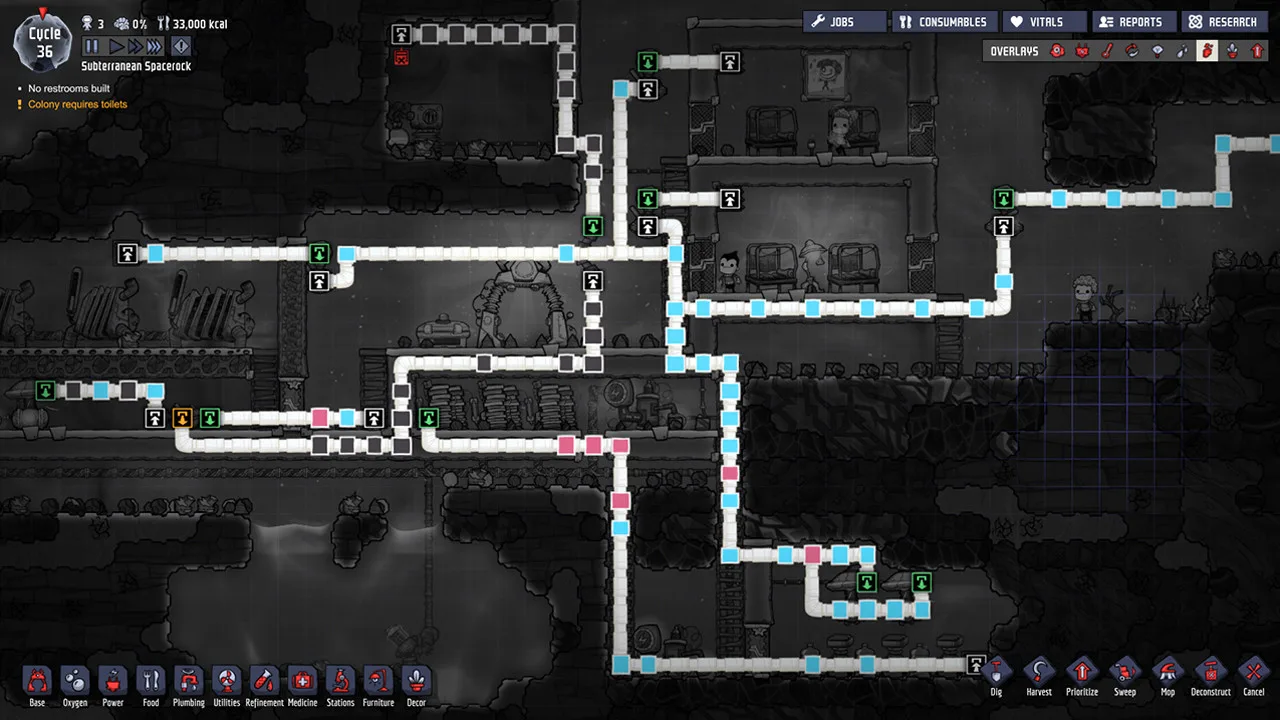 Image: Steam / Klei Entertainment
A liquid lock prevents hot gases from freely exchanging with your base atmosphere. The liquid itself can still transfer heat, so inspect warm entrances and cool them when necessary.
Give cooled air room to circulate. Open ladder shafts and airflow tiles help oxygen move between rooms and allow carbon dioxide to settle downward. Airflow distributes cooling; it does not remove heat by itself.
Electrolyzer oxygen also deserves attention. Pass hot oxygen through radiant gas pipes in a cooling chamber before distributing it around the base. Spread delivery vents through the occupied areas so cooled oxygen can reach more than one room.
Keep substantial machinery heat on a liquid cooling loop. Cooling incoming oxygen helps, but it should not be your only response to generators heating the living area.
Use Ice, Wheezeworts, and Natural Cooling Before Steel
Rescue a hot farm with an ice Tempshift Plate
An ice Tempshift Plate provides temporary cooling while you prepare a permanent system.
- Collect at least 800 kg of ice, preferably from a frozen biome.
- Contain the area so melted water will not spill into nearby rooms.
- Build the Tempshift Plate near the overheating plants.
- Let the ice melt and the resulting water absorb heat.
- Mop up the water after it has warmed toward the room’s temperature.
Check the crops while the plate melts: the immediate area can become too cold before temperatures settle.
Avoid relying on an Ice Maker and Ice-E Fan as your main cooling system. They consume electricity or Duplicant labor, and the Ice Maker releases much of the removed heat into its surroundings.
Plant Wheezeworts for localized cooling
Wheezeworts draw gas through their lower tile and release it from their upper tile 5°C colder. A domesticated Wheezewort processes 1 kg/s of gas and provides four times the cooling of a wild one.
Hydrogen increases their cooling output because of its specific heat capacity. They can also cool oxygen directly when placed around a warm room.
Supply domesticated plants with phosphorite. Drecko ranching can provide a renewable fertilizer supply.
In Spaced Out!, Wheezeworts emit radiation. Keep that exposure in mind when placing several near frequently occupied rooms.
Borrow cooling from a frozen biome
Run a closed polluted-water loop through a frozen biome to move heat out of your base. Use heat-exchanging pipe sections at both ends: one inside the base and another in the cold area.
This arrangement has a limited lifespan. The frozen biome warms as it absorbs heat, so monitor its temperature and prepare another heat sink before its cooling capacity runs out.
Put slush geyser output to work
Cool Slush Geysers produce polluted water at −10°C, while Cool Salt Slush Geysers produce salt water at −10°C.
Route that liquid through warm rooms before sending it to its next use. Add temperature control so continued flow does not overcool farms.
Use an Anti Entropy Thermo-Nullifier
An Anti Entropy Thermo-Nullifier consumes hydrogen and cools its surroundings, reaching temperatures as low as −173°C.
Pass coolant through a heat-exchange area around the building. Connect a pipe temperature sensor to a hydrogen Gas Shutoff so the hydrogen supply stops when the coolant reaches its target.
Protect the coolant from freezing. The nullifier’s minimum temperature is far below the liquid range of polluted water.
Add Precise Temperature Control With a Cold Injector
A direct Aquatuner loop is useful for ordinary base cooling, but its 14°C cooling step makes tight temperature control harder. A cold injector separates the cooling machinery from the loop serving your temperature-sensitive area.
Build the Aquatuner loop to chill a block of diamond Window Tiles. A second loop exchanges heat through a buffered liquid pool, with mechanized airlocks controlling thermal contact between the warm and cold sides.
The doors act as a heat switch:
- Closed doors conduct heat into the chilled block.
- Open doors in a maintained vacuum interrupt that heat transfer.
Control the doors with a Thermo Sensor in the water or polluted-water buffer. The liquid mass stabilizes the temperature while the secondary loop carries cooling to the target area.
Chill the cold block 40–50°C below the desired target when the coolant’s liquid range allows it. Never force polluted water below its freezing point to reach that difference.
Use conductive door materials; steel improves heat transfer if you can spare it. The doors can operate without power in this arrangement.
Troubleshoot Stalled Flow, Broken Pipes, and Overheating
The November 19, 2026 Quality of Life Update adds tools that make cooling-loop problems easier to locate.
| Tool or change | What it helps you identify |
|---|---|
| Pipe Flow sub-overlay in Plumbing and Ventilation | Flow direction and blockage locations |
| Pipe damage status messages | Whether contents changing state broke a pipe |
| “Pipe Network Requires Building Intake” status | A missing intake preventing network operation |
| Heat Source and Heat Sink icons for Aquatuners and Thermo Regulators | Where the machine absorbs and releases heat |
Coolant stops when the Aquatuner switches off
Inspect the bypass bridge and its connection to the outgoing line. Then check for an overfilled loop or conflicting flow directions.
Use the pipe-emptying command to remove excess liquid if necessary. Watch the loop with the Aquatuner both enabled and disabled.
Pipes break near the Aquatuner
Inspect the incoming packet temperature and sensor threshold. Subtract 14°C from the inlet temperature to check whether the machine will freeze the coolant.
Also inspect insulated sections inside the steam chamber. Coolant can absorb unwanted heat there if the pipe materials allow too much exchange.
The Steam Turbine stops operating
Check its temperature and the pipe section cooling it. Confirm that coolant continues circulating through the turbine room while the Aquatuner is disabled.
Inspect the steam chamber separately for intake obstructions or stray gases.
Coolant circulates, but the room stays hot
Check the pipe material where cooling is needed. An insulated pipe carries cold liquid through a room while exchanging very little heat with it.
For space-exposed machinery, pipes in a vacuum need a heat-transfer medium. Add a thin liquid layer backed by Drywall so the liquid remains in place and can transfer heat between the equipment and cooling pipes.
The farm becomes too cold
Raise the cooling threshold or reduce direct heat exchange near the crops. If the room requires tighter control than the Aquatuner’s 14°C step allows, move it onto a buffered secondary loop with a cold injector.
Continue with
 Oxygen Not Included Thermally Reactive vs High Thermal ConductivityOxygen Not Included thermally reactive vs high thermal conductivity explained: compare heat capacity, pipe materials, and coolants for safer base cooling.
Continue exploring
Oxygen Not Included Animal Farm: Hatch Ranch Guide
Build an Oxygen Not Included animal farm with eight-hatch stables, automated egg removal, reliable feeding, and incubator controls that cut power use.
Oxygen Not Included Base Layout: Plan for Every Stage
Plan your Oxygen Not Included base layout with room for oxygen, plumbing, cooling, and industry. Build a colony that grows from survival to sustainability.
Join the community
Official channels for news, updates and player help: